
It seems as if the weather has finally realized that it’s summer… right when it’s time to start preparing for the upcoming school year! Oh, well, here we go!
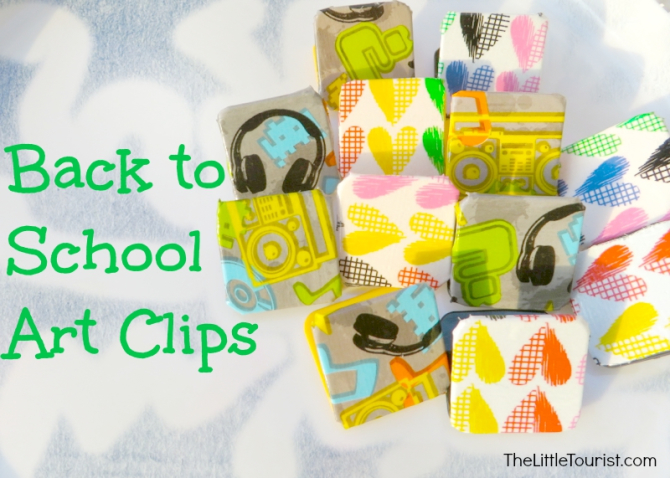
I’m excited about the kids returning to their studies. This year they will begin a new program, one that’s sure to bring a lot of transitions, but even more cool experiences! As all parents know, school usually means a lot of paperwork and artwork. If the kid’s backpacks aren’t cluttered, it’s my table… or shelves… or refrigerator. I learned (at the end of last school year) that it’s best to giveaway some things to nana and grandpa, store some for memory sake or those showing growth development, and throw the rest away! There’s only so much one home can take! lol! The really cute pieces, however, must absolutely be put on display. This makes both you and your child feel good by looking at their accomplishment. It also gives you the ability to brag- without bragging- when guest come over. So, to prepare our home for the awesome collection we’re sure to receive, we made some back to school art clips.
Clips are very easy to find and come in all colors, sizes, and even different shapes. One day as I was walking through the store, I saw some really cute clips. They had a little design on the front but, otherwise, were your standard clips. I took a closer look and realized that I could totally make something similar without breaking the bank… I’m all about keep my bank intact! lol! I gathered the few materials needed (only 3!) and set down for some family craft time. This project did not take a lot of time at all, but the results were as cute as the clips I saw in the store. Check it out!
Tools:
- Duct Tape with a design/pattern (the more the merrier!)
- Clips (with flat top)
- Scissors
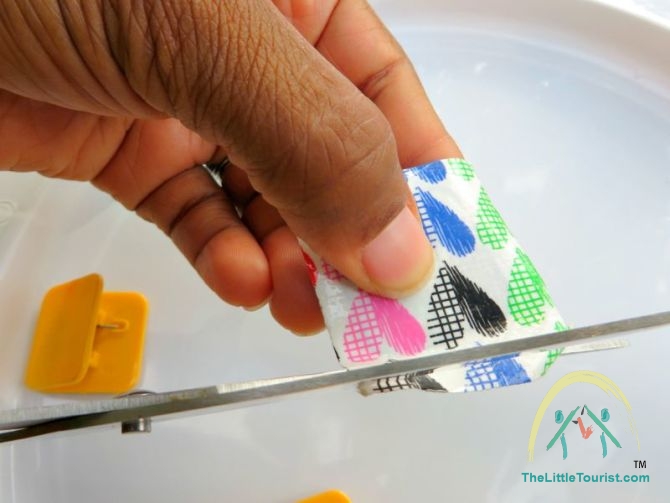
Getting Started:
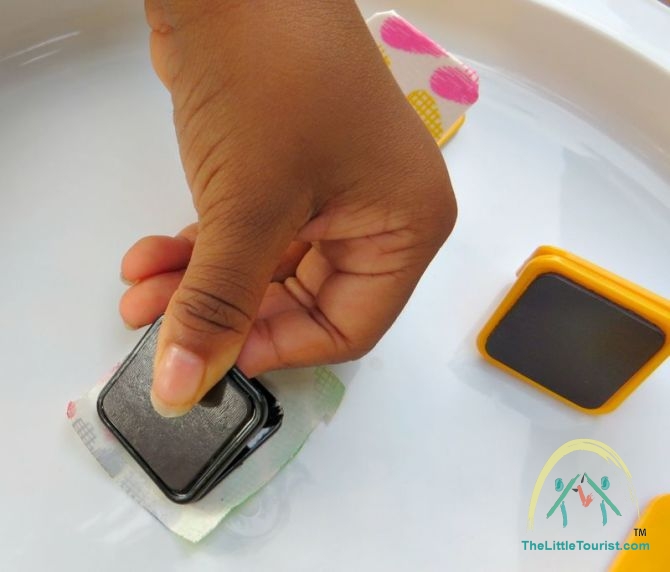
- Unwrap your packages of duct tape and clips
- Taking account for the size of the clips, cut a corresponding piece of duct tape
- Place it over the front of the clip and trim any excess tape (you want a little to hang over, but not a lot)
- Fold the remaining part of the tape over and around the edges of the clip
- Smooth out any ridges as you go
- Continue until you have completed all the clips and then get ready to hang up some artwork!
Tips:
- These little cuties can be repackaged and given as a gift to your child’s teacher!
- Share some with the grandparents when you “share” some of your child’s artwork lol!
- The more patterns and colors, the better! Don’t be shy about grabbing multiple duct tapes for variety
- The remaining duct tape can be used to decorate a folder, pencil holder, locker, etc. They are very versatile 😉
- Just in case you’re wondering… I got all my supplies from the dollar store, but you can pick them up almost anywhere!
Do you have any other great ideas for art clips? Share them!